
Say Goodbye to Dry: Expert Tips for a Juicy Thanksgiving Turkey
Every Thanksgiving, home cooks across the country face the challenge of presenting a perfectly cooked, juicy turkey. This year, we’re dishing out professional advice to ensure your bird is the highlight of the holiday, moist and flavorful from the first slice to the last.
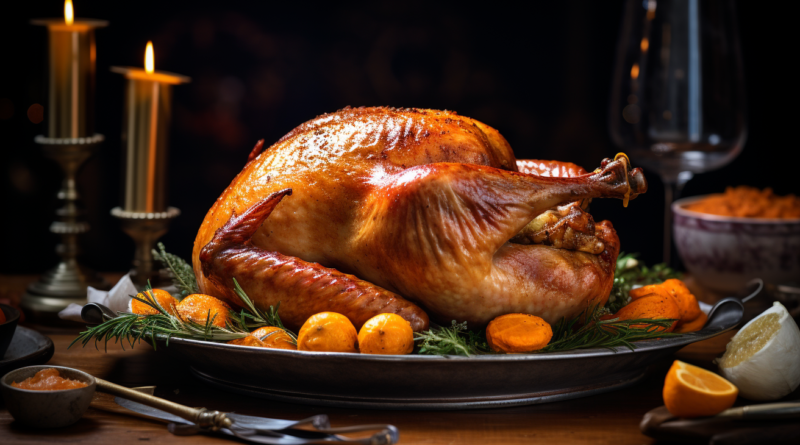
The annual Thanksgiving turkey is a culinary centerpiece that inspires both excitement and a bit of dread. Dry turkey has plagued many a feast, but with a few key tips and techniques, you can keep your bird succulent and full of flavor.
Brining Basics: Moisture is the magic word when it comes to brining. Soaking the turkey in a saltwater solution, or even better, using a flavor-infused brine with herbs and spices, can make a world of difference. The process not only seasons the turkey but also helps to break down proteins, resulting in tender, juicy meat.
Temperature Tactics: Overcooking is a surefire way to a dry turkey. Experts recommend using a reliable meat thermometer to check for doneness, aiming for a breast temperature of 165°F and a thigh temperature of 175°F. Remember, the turkey will continue to cook as it rests, so pull it out of the oven a little before it reaches these temperatures.
Basting Benefits: Basting the turkey with its own juices, stock, or a butter mixture helps to add flavor and moisture throughout the cooking process. However, opening the oven door too often can lead to heat loss and longer cooking times, so baste sparingly or use a basting brush to quickly apply glazes.
Low and Slow: A low-temperature oven (around 325°F) allows the turkey to cook evenly and retain moisture. Some chefs suggest starting the turkey at a high temperature to crisp the skin and then lowering the heat to finish cooking.
Cover Up: If the turkey begins to brown too quickly, tenting it with aluminum foil can prevent overcooking the outside before the inside is done. This method also helps to lock in steam and keep the meat moist.
Rest and Relax: Resting the turkey after cooking is non-negotiable. A rest period allows juices to redistribute throughout the meat, ensuring that each slice is as moist as the next. Cover the turkey with foil and let it sit for at least 20 minutes before carving.
Alternative Approaches: For those willing to break with tradition, spatchcocking (removing the backbone and flattening the turkey) ensures faster, more even cooking. Another method is to cook the breast and legs separately, accommodating their different ideal temperatures.
Conclusion: With these strategies, a dry turkey doesn’t have to be a Thanksgiving tradition. Whether you’re hosting for the first time or you’re a seasoned pro looking to perfect your poultry game, following this guide will help you achieve a tender, juicy turkey that’s worthy of celebration. So go forth with confidence—your juiciest turkey yet awaits this holiday season.
Here’s a recipe for a perfectly moist and flavorful turkey:
Perfect Roast Turkey Recipe
Ingredients:
- 1 whole turkey (12 to 14 pounds), thawed if frozen
- Salt and freshly ground black pepper
- 2 onions, peeled and quartered
- 4 garlic cloves, peeled and lightly crushed
- 1 bunch fresh thyme or a mix of herbs (rosemary, sage, and parsley)
- 2 bay leaves
- 1/2 cup unsalted butter, melted, plus 2 tablespoons for stuffing under the skin
- 2 cups chicken or turkey stock, for basting
Brine (Optional for Moisture and Flavor):
- 1 gallon vegetable broth or water
- 1 cup sea salt
- 1 tablespoon crushed black peppercorns
- 1 tablespoon sugar
- 1 gallon ice water
Instructions:
- Brine the Turkey (Optional): To brine the turkey, combine the vegetable broth, salt, peppercorns, and sugar in a large stockpot. Bring to a boil, then remove from heat and let cool. Once cooled, combine with ice water in a large bucket or pot. Place the turkey in the brine, cover, and refrigerate for 12-24 hours.
- Prepare for Roasting: Preheat your oven to 325°F (165°C). Remove the turkey from the brine, rinse under cold water, and pat dry with paper towels. Season the cavity of the turkey with salt and pepper, and stuff it with quartered onions, crushed garlic, herbs, and bay leaves.
- Butter Up: Gently lift the skin from the breast meat and push the softened butter under it, spreading it as far as you can over the thighs and breasts. This will help keep the meat moist and add flavor.
- Tie and Tuck: Tie the legs together with kitchen twine and tuck the wing tips under the body of the turkey. This promotes even cooking.
- First Baste: Brush the outside of the turkey with melted butter and season with salt and pepper.
- Roast: Place the turkey on a rack in a roasting pan. Pour the chicken stock into the bottom of the pan. Roast the turkey, basting every 30 minutes with the juices on the bottom of the pan. Halfway through cooking, if the skin is golden-brown, tent the turkey with aluminum foil to prevent over-browning.
- Check for Doneness: Roast until a thermometer inserted into the thickest part of the thigh reads 165°F and the juices run clear. This will take about 3 to 4 hours for a 12 to 14-pound turkey.
- Rest Before Carving: Transfer the turkey to a cutting board and let it rest for at least 20 minutes. This allows the juices to redistribute throughout the meat, making for moister slices.
- Serve: Carve the turkey and serve with your favorite side dishes.
Remember, every oven is different, and factors like the starting temperature of the turkey (chilled vs. room temperature), the accuracy of the oven’s thermostat, and how often the oven door is opened will affect the cooking time. So, it’s always best to use a meat thermometer to ensure your turkey is perfectly cooked. Enjoy your holiday feast!